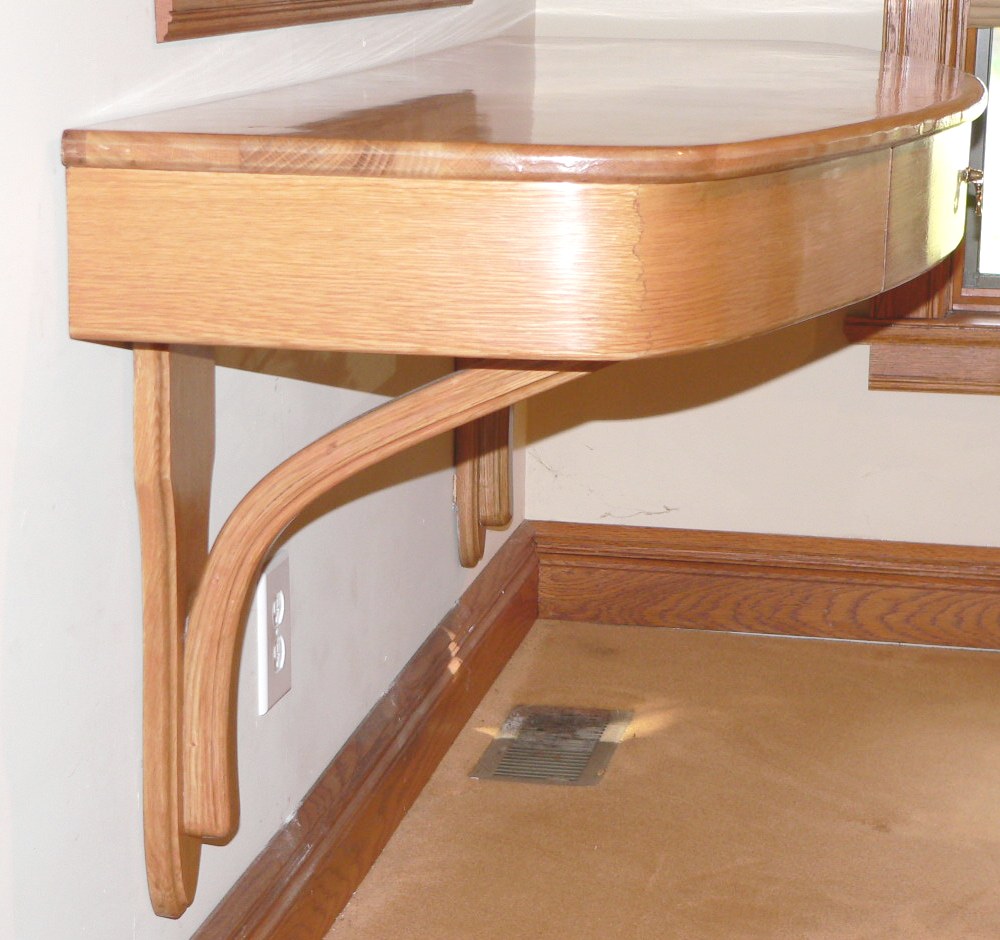
Wall Hung Table
Wall Hung table
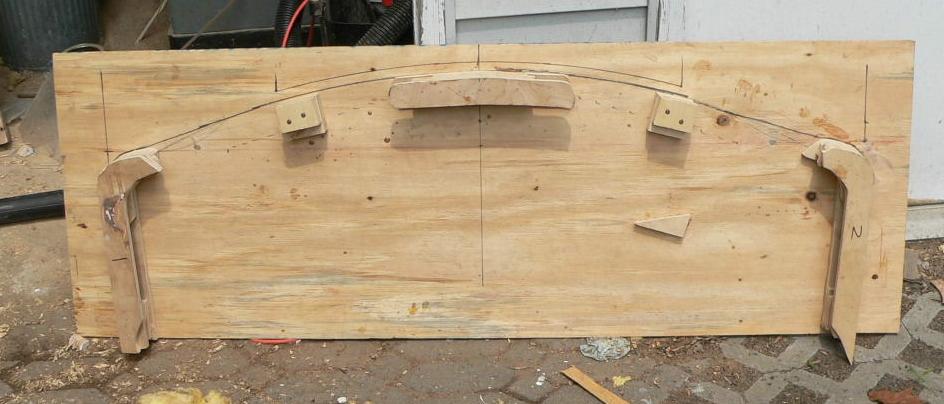
You need to start with a bending form made from lamination for 3/4 plywood. The taper sides allowed for spring-back in the pieces
After adjusting the template an ash rail-stile-panel was made to conform to the pattern.
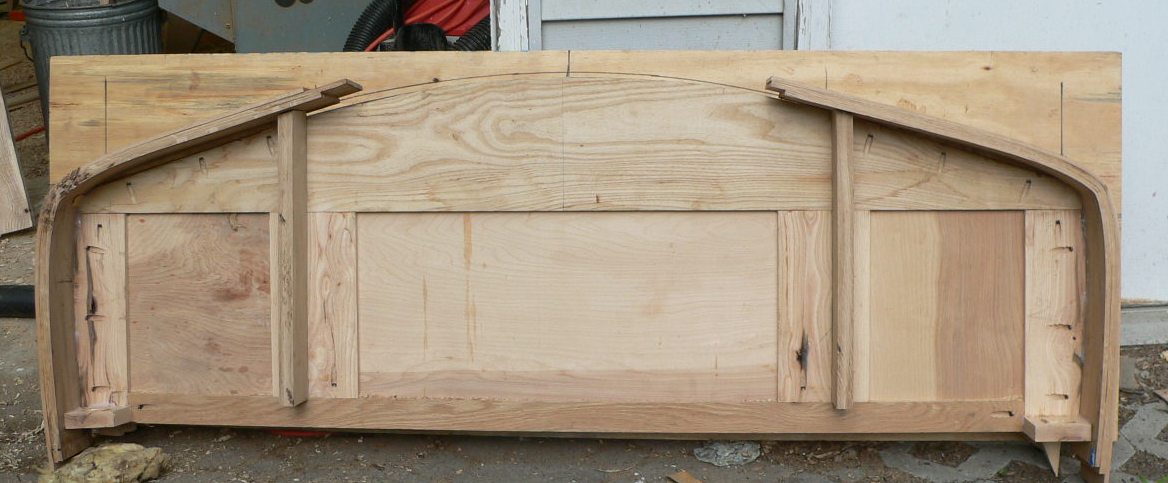
Take out the twist in the steam bend by screwing it into the top mirror image frame.

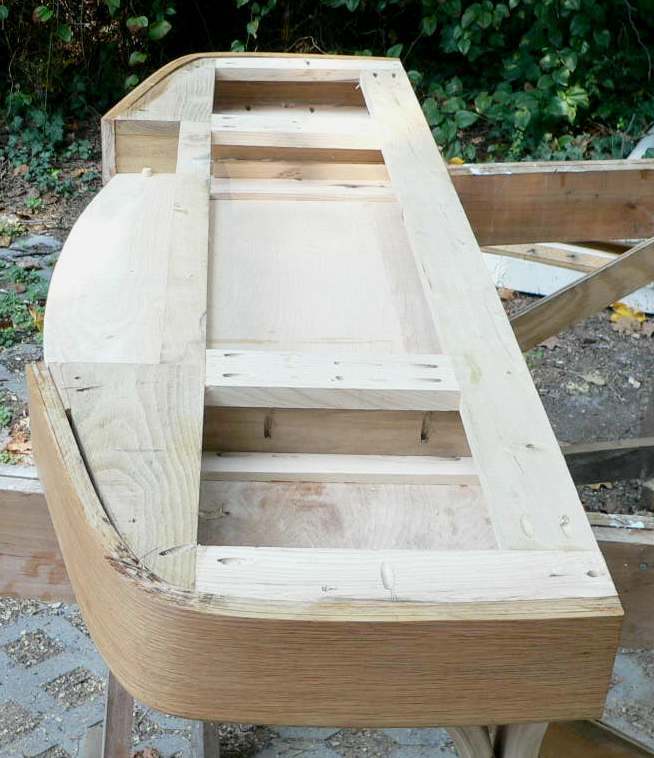
Cheater pieces allow a 90 degree alignment to fit into dovetail machine
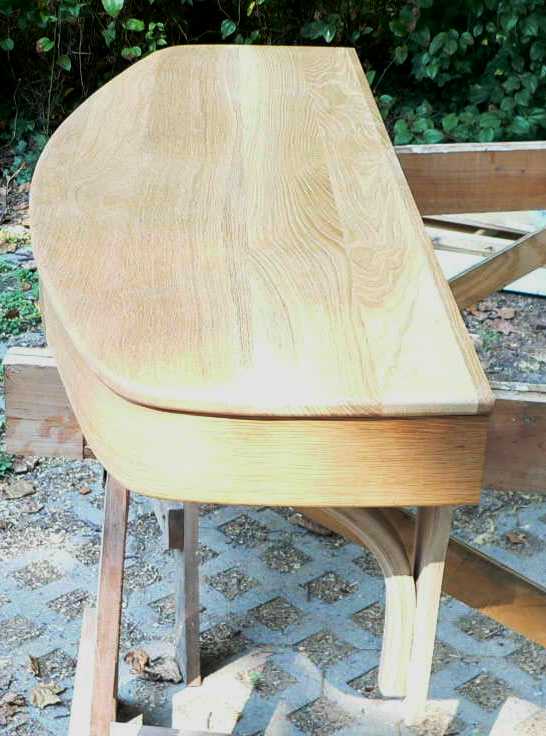
Almost there and ready for finish and installation
Chessboard Game Table
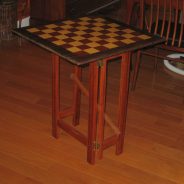
In the open position the legs and stabilizing arm lock in place with rare earth magnets Swing the two hinged legs out and lock into position with the stabilizing arm Lower the top Engage the catches by aligning the male and female elements and pushing down. (audible click)
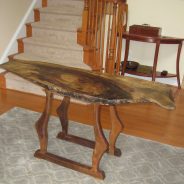
read moreNatural edge Coffee Table
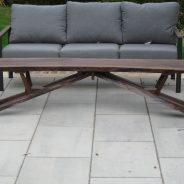
The client provided the dimension of 79 inches long and 19 inches tall. A single Black Walnut board provided a 17 inches wide natural edge pieces to complete the design and construction. The client wanted as tapered instead of squared lines. A penetrating epoxy sealed the surface (https://www.jamestowndistributors.com/product/product-detail/97636)before top-coating with TotalBoat Halcyon satin varnish (https://images.jamestowndistributors.com/images/varnish/halcyon-clear-satin-varnish-1-quart.jpg) Made from a single Black Walnut...
read more3 Drawer plywood chest
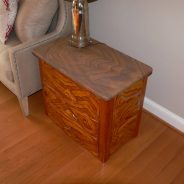
Plywood cut at an acute angle across the ply veneer yields a random patterns on a three dimensional surface. Connecting the panels to carcass frame creates a chest with three drawers. A complimentary sandstone top finishes this functional storage unit. Decorative panels on all 4 sides Patterns from the sandstone similar to the exposed plywood veneerPlywood veneer layers exposed to create a three dimension surfaceBack panel provides four decorative surfaces for displayThe three drawers use blum undermount soft close...
read moreGallery 2020
This year’s gallery features designs that highlight the natural growth patterns of the wood itself. Sometimes insects and weather made modifications. Other times the splitting wedge exposed the grain sculpture resulting from the tree responding to environmental stress in its life. Side table from hollow tree branchHall table – Bark side up optionHall table – Bark side down optionMaple desk or dining table featuring Bark edges https://www.youtube.com/watch?v=fkiU4wCXuTk&t=2s shows more details of these and...
read moreSplit personality table
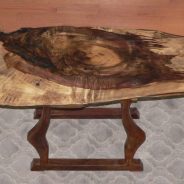
Barkside downBarkside upA single Black walnut branch burl (with bark intrusion) had a different personality on each side. Neither side should be permanently buried on a table’s underside. Epoxy stabilizes and fills the bark intrusion and any other voids on the bark-side down 60 x 19 inch surface. The surface has a gentle undulation from the saw blade flexing as it encountered different densities wood fiber within the burl. The tightly adhered bark layer proved difficult to remove. Instead of removal, the barkside up features a rough...
read moreBench Table
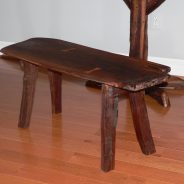
Bench table utilizing the cutoff Walnut natural edge slab from http://www.wccwood.com/wind-blows-urban-forest/ can be used as bench or small coffee table. The sturdy splay-legged design used four billets split from a walnut log as legs. These legs retained the natural surface resulting from splitting. Wood pegs eliminated the use of metal fasteners. 16 inches height places the 36 x 14 natural edge wood top at a height that can be used as a table or a benchNatural edge Walnut stabilized with butterflies and preserved with Tung oilBillets...
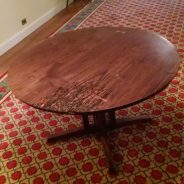
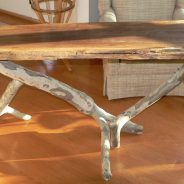
read moreCompass Rose Table

36 Inches diameter top sitting atop a 30 Inches Cherry “cluster” pedestal Compass Rose table uses cutoff discards from other projects. These premium lumber parts are glued to form a 2 inches thick geometric pattern table top. After milling the resulting top to a 1.5 inches thicken it attaches to a Cherry “cluster” pedestal similar to the http://www.wccwood.com/embassy-round-table/. The link to this table is further strengthen by using the Walnut discards from its pedestal to form the four central compass points. Other...
read moreEmbassy round table
Design concept provided by the client Embassy round table was part of the order for Embassy redecorating http://www.wccwood.com/embassy-console-table/ . The interior designer wanted a reproduction of this table. “Cluster pedestal” design made from 2 inches thick Black Walnut A 27 wide 2.25 inches yielded a 48 Inches diameter (1.5″ thick) table top that features epoxy filled insect damage area. Dovetail Dutchmen stabilize check cracks. Center room staging makes the table the center of attention. A companion...
read morewind blows urban forest
wind-blow-table that used materials harvested from the urban forest sustained damage when transporting to the annual art exhibition. The damage translated into a wobbly mess. But one attendee saw the “vision” and asked for a “one of a kind” stable version. A 7 feet walnut slab with natural bark edge and some retained stout Sycamore branches produced an urban forest piece that met customer’s expectations. See the design phase https://www.youtube.com/watch?v=dLEBXOcxHhc Bark edge Black Walnut slab and sycamore...
read moreEmbassy Console Table
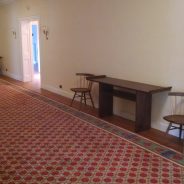
Embassy (for a G-7 Country) redecoration project’s interior designer commissioned two exact console table reproductions (Figure A). Highlighting the wood’s character with a low sheen oil finish expanded the specification list. The client wanted either all solid Black Cherry or Black Walnut construction. C P Johnson Lumber sourced the premium grade Black Walnut (5/4 thick) chosen for the reproduction. Figure A was imported into Microsoft PowerPoint. Proportional scaling from the width, length, height measurements accompanying...
read more