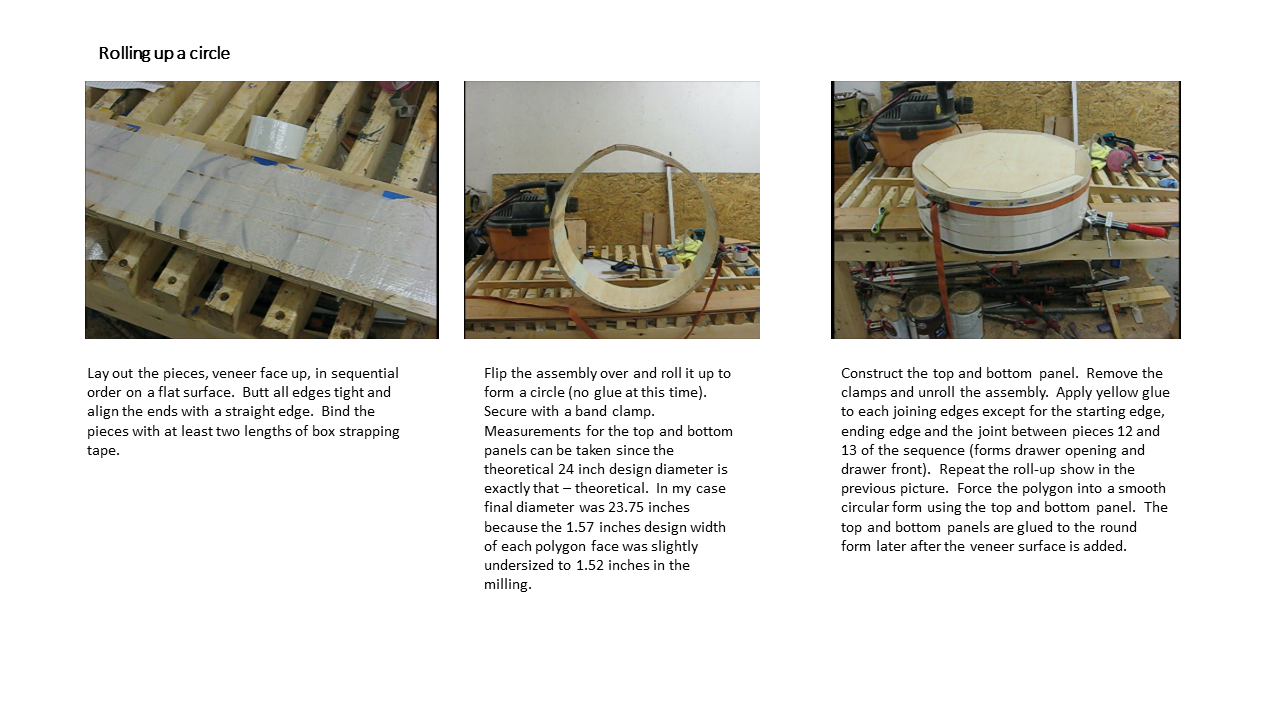
Shop made veneer
Sycamore shop made veneer
The conference table ate my sycamore stash except for about 4 board feet of wood with knots and very striking quartersawn ray patterns. These boards were a full 7/8” surfaced lumber. Select removal of the defects maximized boards ranging between from 16 to 26 inches in length. At this point I could make a few small boxes or I could make veneer and build real furniture.
Making Veneer
Unless you are training for the triathlon, making veneer is a power saw game. In the artisan woodshop, a bandsaw or table saw represents the most likely choices that have the power, accuracy and precision needed to yield usable veneer. Unless you have invested in specialized saws, 1/16” thick veneers can be made however 3/32” to 1/8” thick veneers are easier to cut without the “AW #$%^” scrap making when the blade wanders through the board’s thickness to the surface. The increased thickness also allows more flexibility at the fitting, sanding and scrapping phase. On the downside, a 1/8” veneer expansion and contraction characteristics mimic board movement of thicker lumber so it is critical that the lumber and dimensional stable substrate are conditioned to the same humidity and temperature. The preferred substrate is a thin veneer furniture grade plywood or a stable product like medium density fiberboard – (MDF).
Slicing boards into veneer
Ask an experienced woodworkers how to slice veneer out of lumber-“with a bandsaw” is the answer I would expect to hear. For the thicker 3/32 to 1/8” veneer I use the tablesaw as the tool of choice. The material saved by using a narrow sawkerf bandsaw versus the 1/8 inch tablesaw’s kerf disappears in the surface smoothing phase by planning, scrapping and/or sanding. A quality 24 teeth carbide rip blade produces a veneer surface requiring no or only light surface smoothing before adhering it to the substrate. For boards less than 4 inches wide, veneer pieces are freed by sawing twice from opposing edges. (Suggest blade extension ~2 inches – using full blade extension (3” inches) will overheat my Delta Unisaw after about 50 feet of total cutting and scars the wood from an overheated blade). For 1.75 inch wide pieces, a single pass rapidly produced precise and accurate pieces ready for use. Compared to a bandsaw I feel using a tablesaw provided about a 70% time saving to mill the veneer pieces.
Finding a veneer project
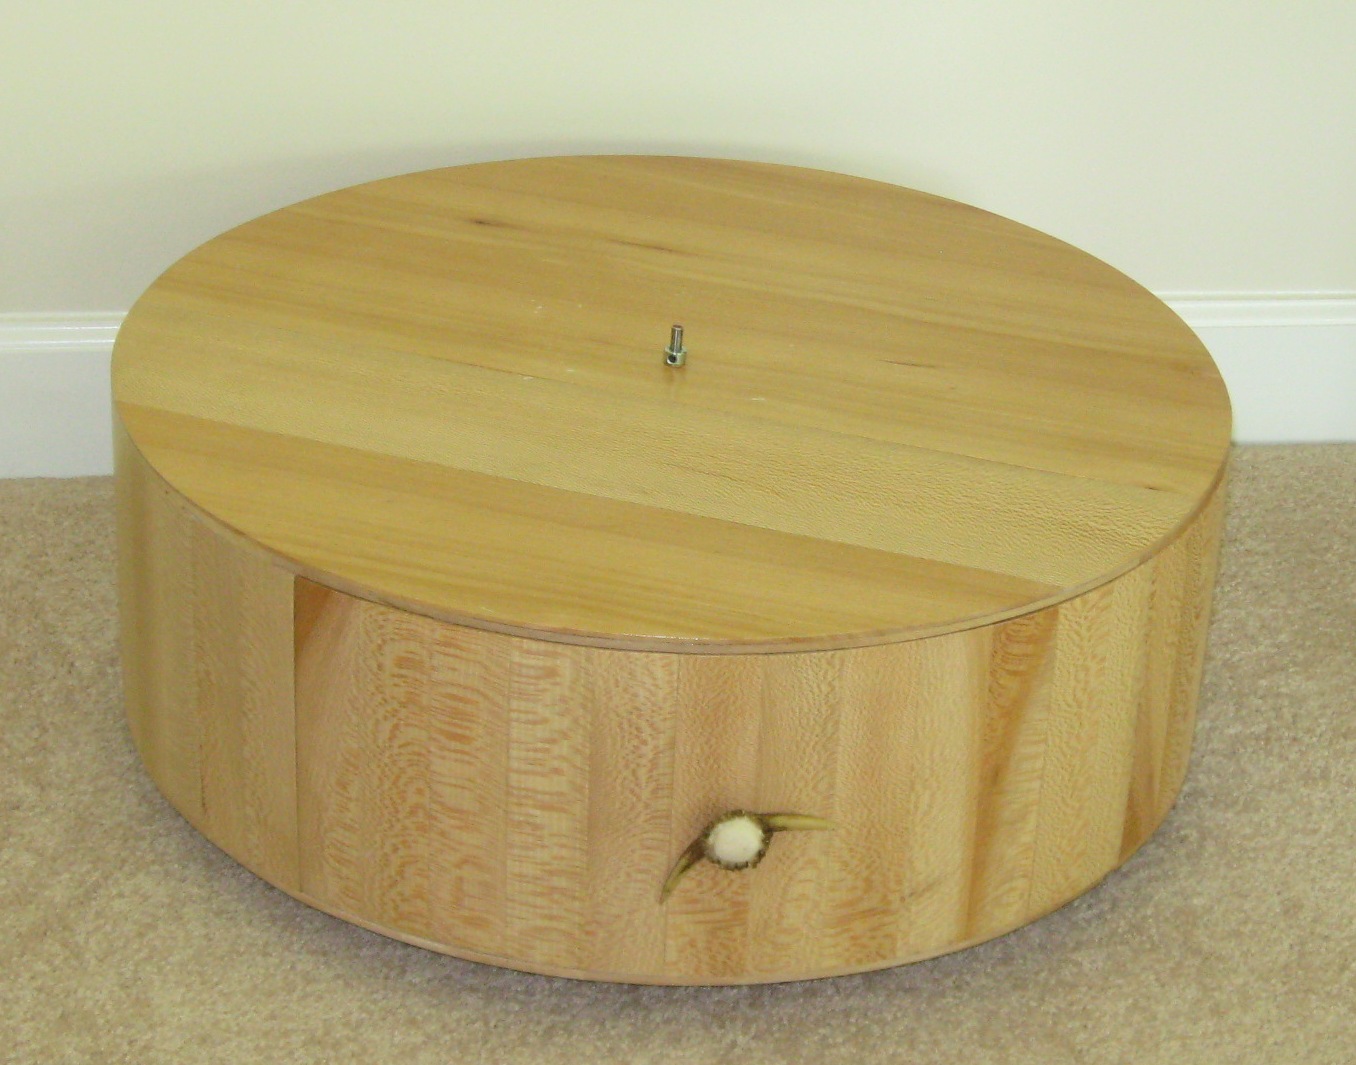
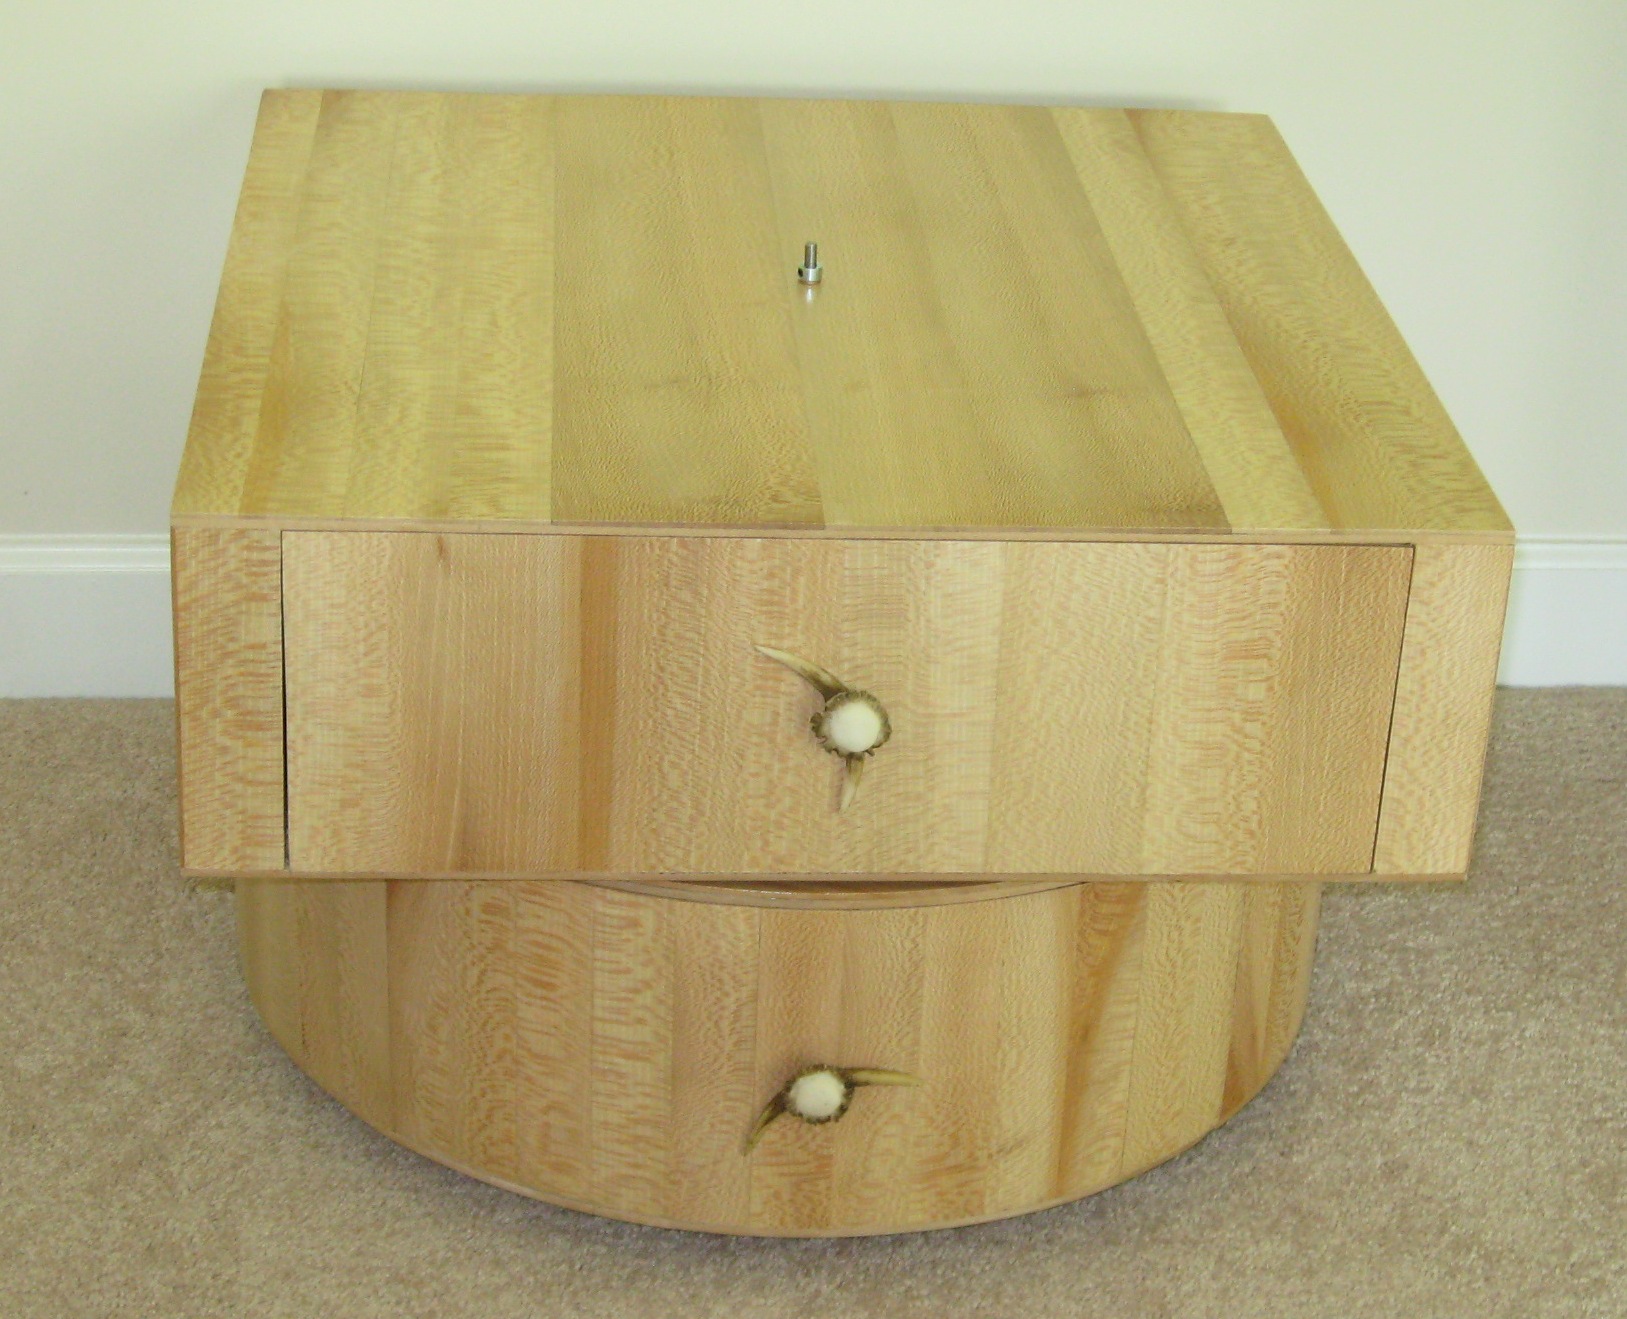
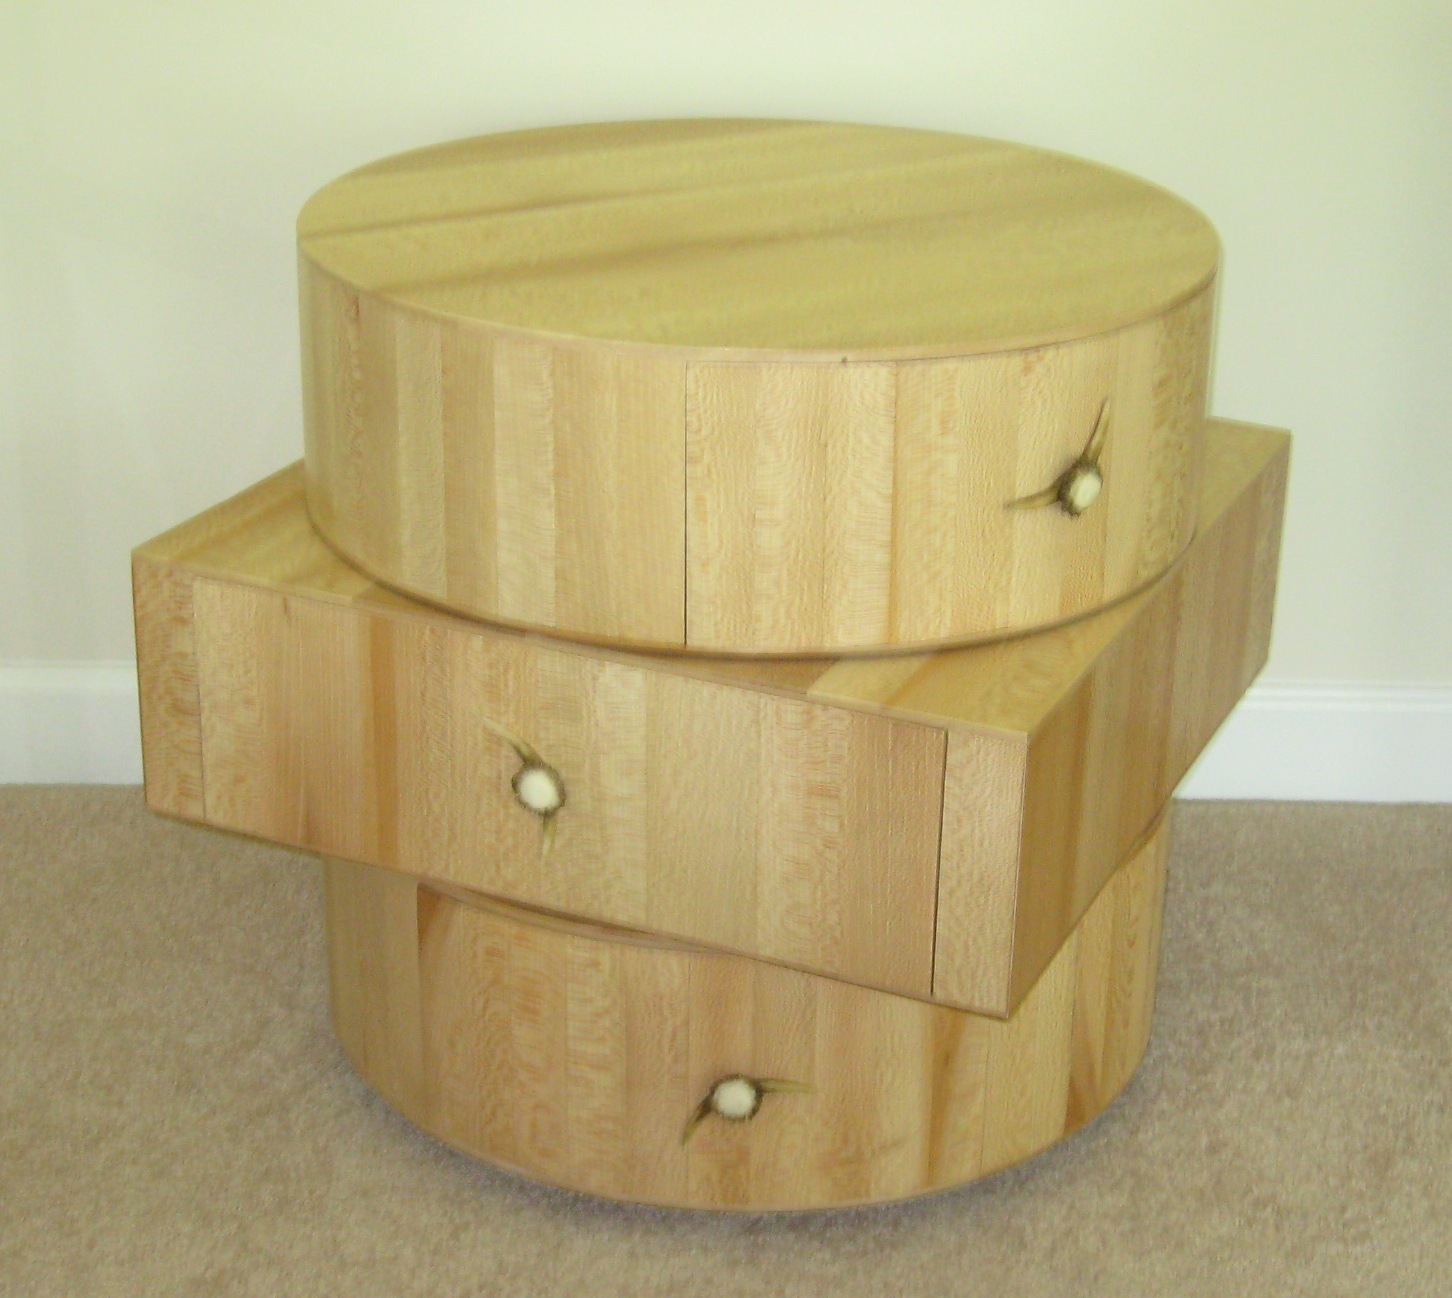
She who must be obeyed (SWMBO) has been leaving pictures of a bedside table around the house for the last three years. Made with Zebrawood, the piece featured 3 levels of drawers. The top and bottom levels are round drums and the middle level is square. The middle and top levels rotate over a fixed bottom level. I really do not see the design’s appeal but SWMBO was having a love affair with it and by the look in her eye when she talked about it – it was a satisfying relationship. Since properly selected sycamore veneer could substitute for the Zebrawood’s interesting grain pattern, a veneer project was born.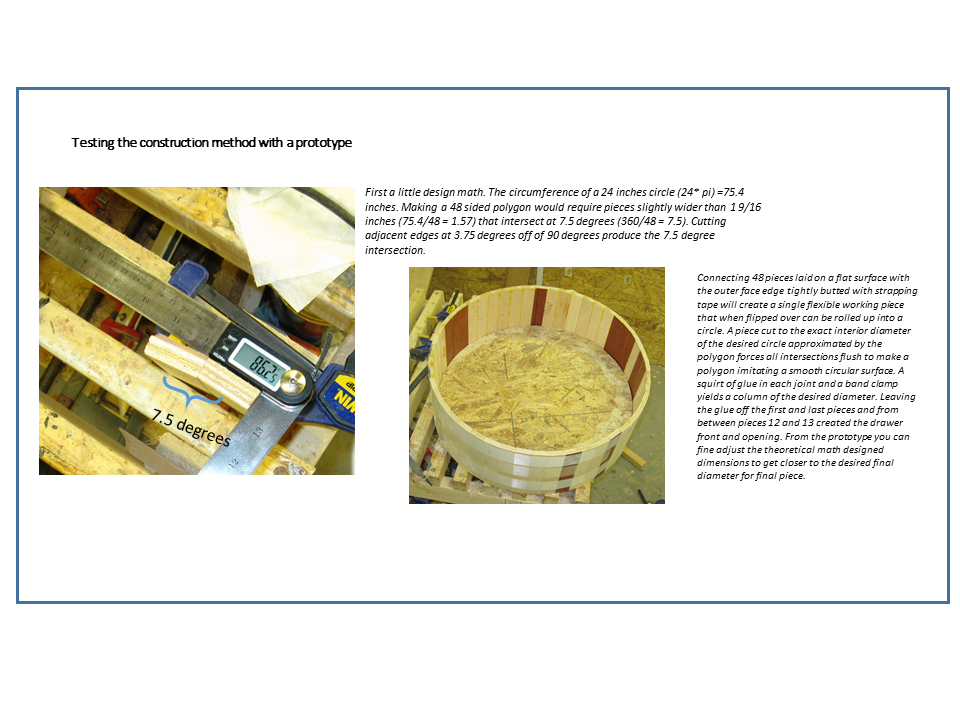
The 24 inches diameter drums levels required adhering veneer to a dimensional stable round substructure. Because I could not consistently steam bend test pieces of the sycamore veneer, I eliminated the painfully option of band sawing a substructure circle from a solid laminated block (game table).
I have had success making octagon columns around lally – columns during a basement remodeling. I decided to try a multi-facet polygon where the faces intersect at shallow angles that could be rounded over without cutting through the veneer face?
After converting the sycamore leftovers into 48 veneer pieces 1.75 inches wide and roughly 15.5 inches long, I cut corresponding pieces from scrap ½ inch sandeply plywood left over from the library project. “Roo Glue” adheres the Sycamore veneer to the plywood pieces. Flush edges between the veneer and plywood pieces are maintained during glue-up. The pieces are cured a minimum of 24 hours prior to milling to reduce any veneer swelling from the glue’s water carrier.
The table saw blade is set at 93.75 degree angle. An electronic protractor eases accurate setting this critical angle. The rip blade is set so it just cuts through the piece and the rip fence is visually set so the blade just nicks the bottom edge (veneer side) of the 1.75 inches pieces. All veneer-plywood pieces are ripped along a single edge (veneer face down because it is a right-tilt saw). The rip fence is set to 1 9/16” and visually verified that it will just nick the veneer face before cutting the second edge.
The pieces are arranged to get the most consistent grain pattern and to highlight the grain on the future drawer fronts (pieces 1 through 12 in a series laid out from left to right). Now flip each piece over and mark a sequential number about 2 inches from the end. Place a duplicate number on the other end. Using a power miter saw, remove defects from one end of each piece (Maximum removal 0.5 inch). Reference the defect-free end against a stop block set at 6.5 inches and remove a single cut piece from each board. Reset the stop block to 7.0 inches and cut each of the remaining (about 8 inches long) pieces.
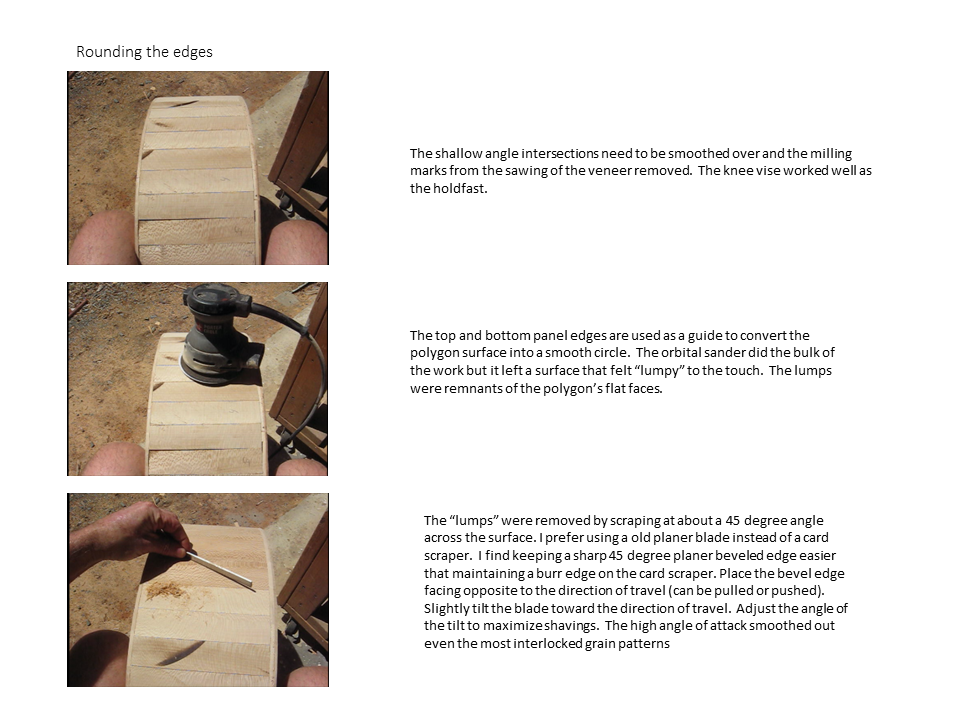
Round Top and bottom panels
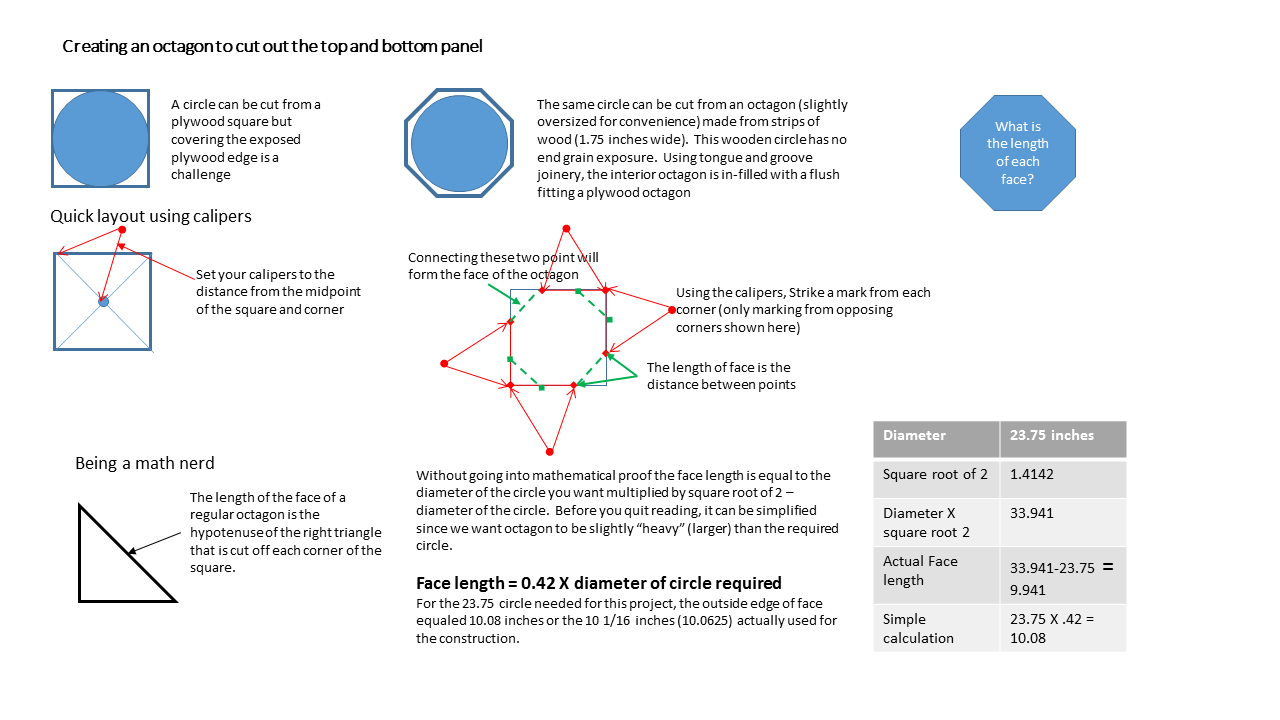
The 23.75 inches circles needed for the round drawer levels start from octagons made from mitered 5/8 inch thick and 1.75 inches wide sycamore strips. The octagon holds half inch plywood interior in-fill panels that sit flush to one face using tongue and groove joinery. After the glue sets, a plunge router and circle cutting jig mills an accurate 23.75 diameter circle to a depth of 3/8″. Rough cutting to about the center of this groove with a hand-held sabre saw freed the circles from the excess materials. A pattern bit follows the smooth face created by the circle cutting jig to complete the final circle’s milling. A 0.5 inch rabbeting bit adds a 3/8″ deep rabbet from one face of each circle. When you finish you want two circles with the rabbet on the flush side (bottom panels) and two circles with the rabbet on side where in-fill plywood is recessed from the surface (top panels). A 22.5 inches diameter 0.75 inch thick plywood circle template and top bearing pattern router bit fine tunes the rabbet’s depth and increase the width to 5/8″. The addition of 1/8″ thick sycamore veneer pieces to flush surface side of the top panels completes the veneering process.
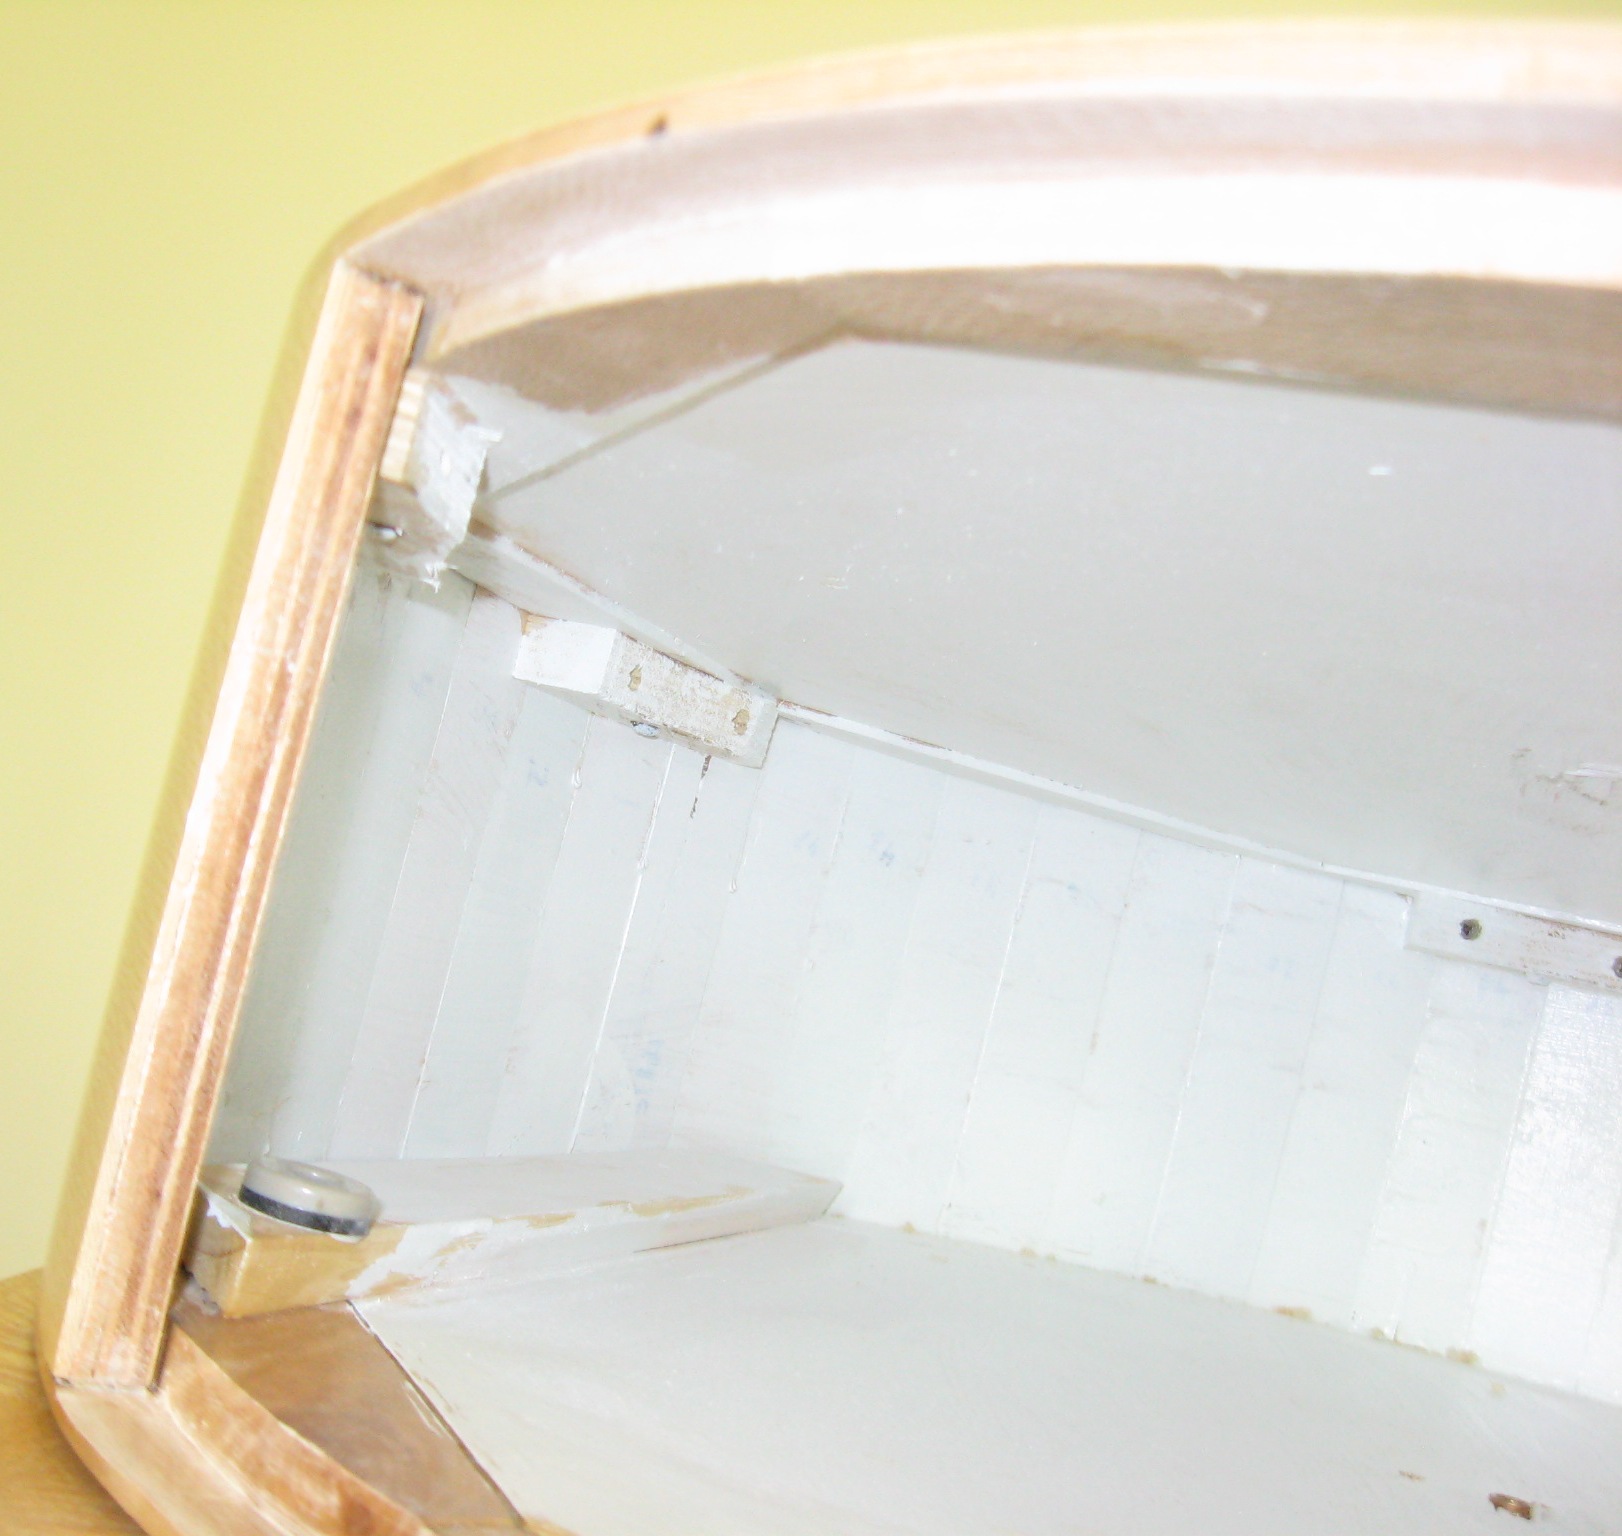
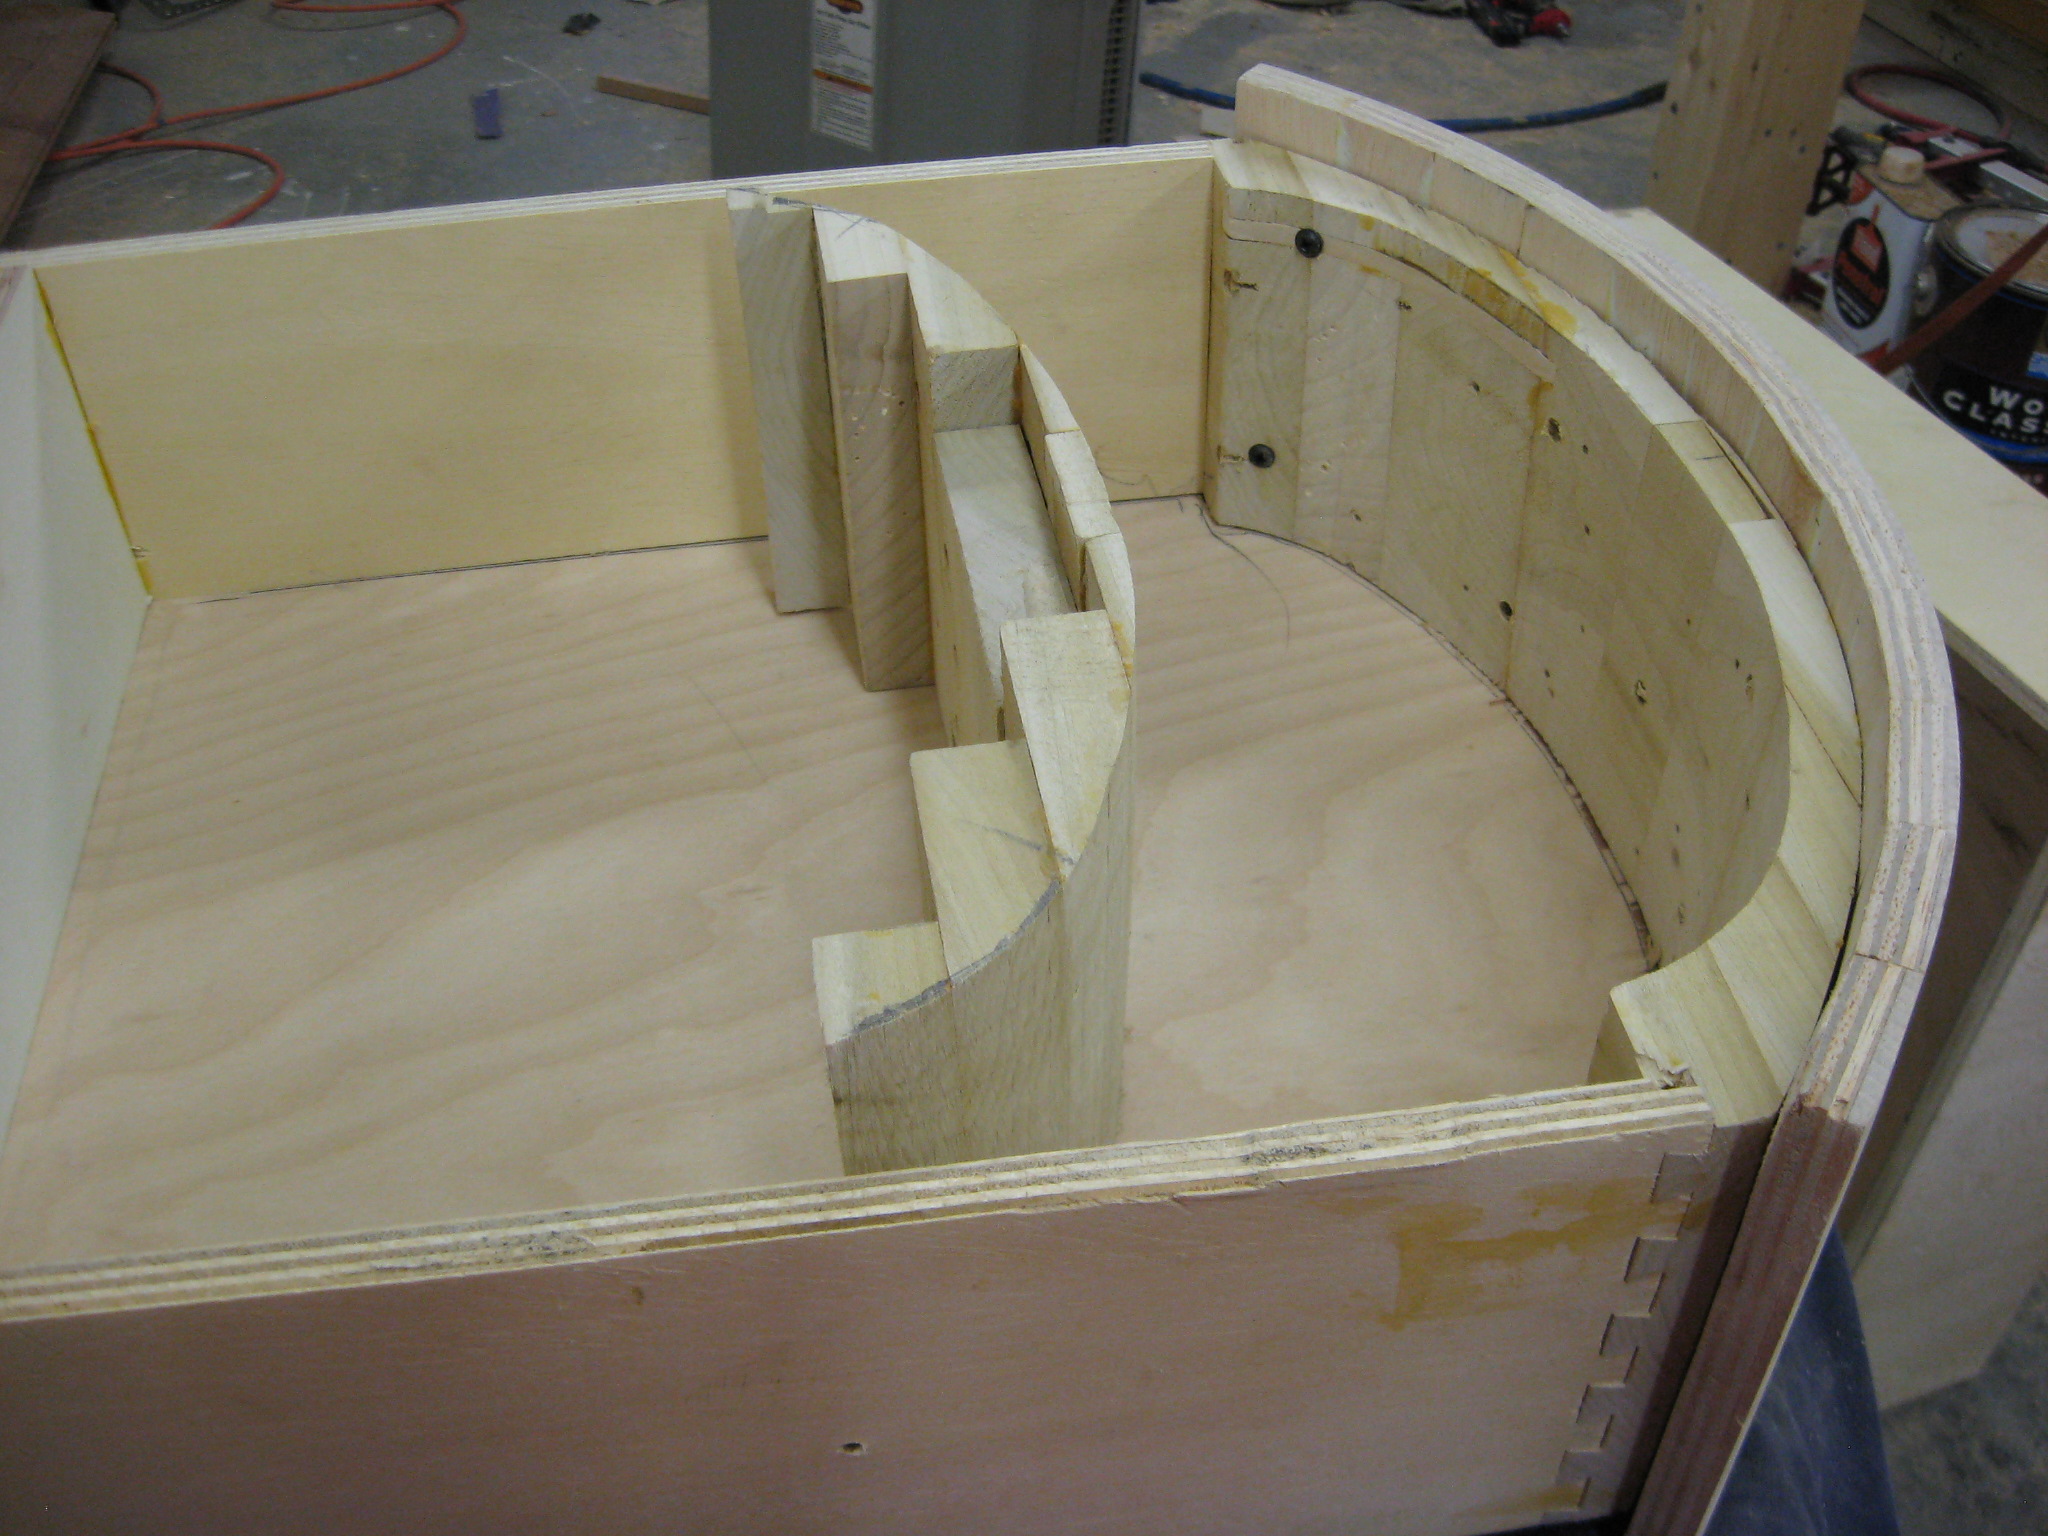
Top panel attached with glue in the rabbet and secured with screws through the glue blocks.
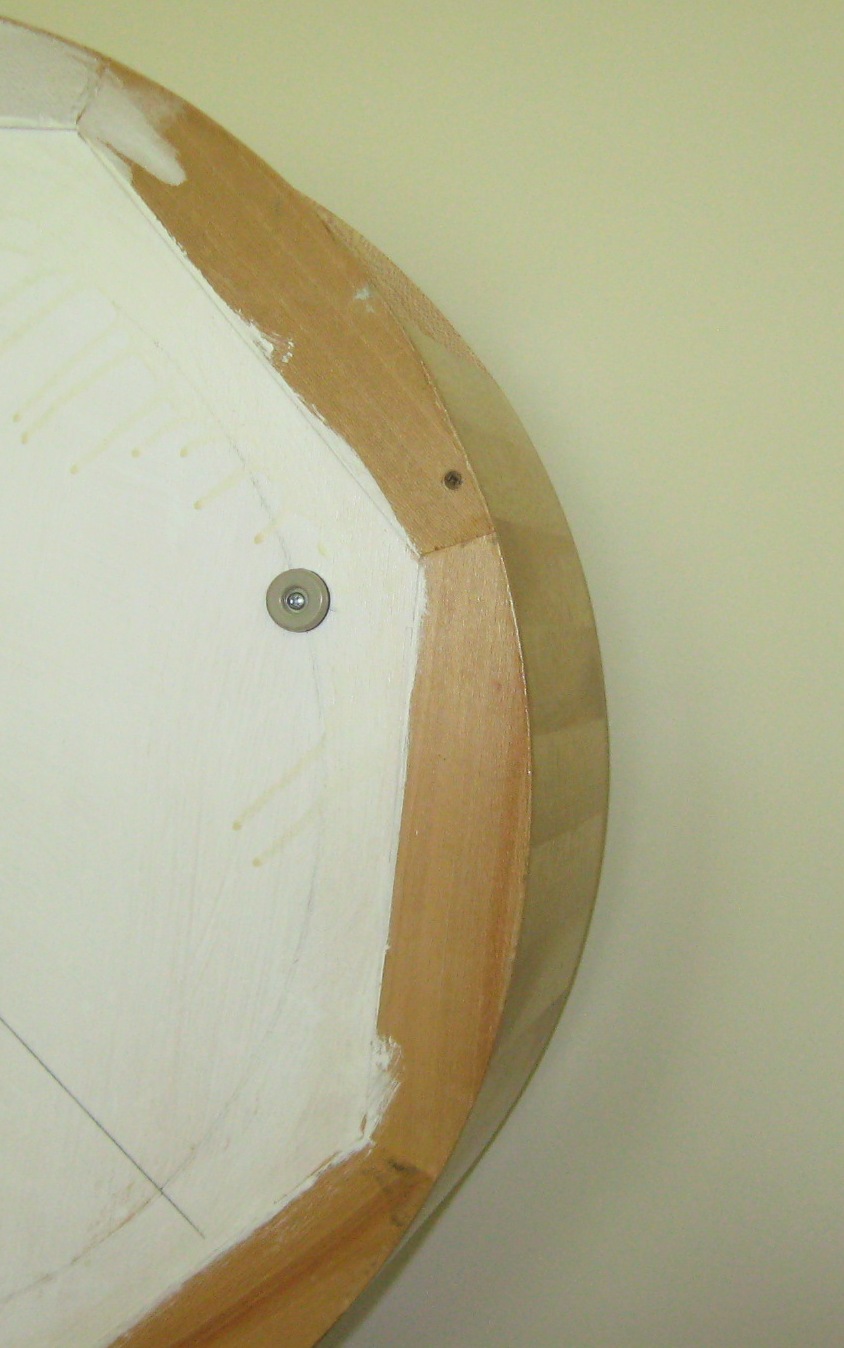
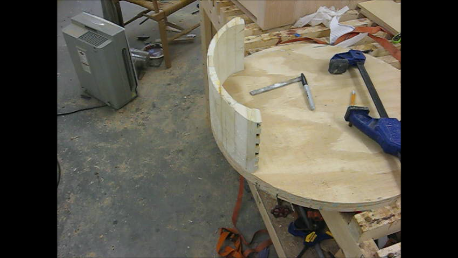
Bottom panel attached with glue and screws
Small glue blocks (5) that have a 7.5 degree intersection milled to one face are glued and screwed on the upper inside edge 0f the round substrate. Glue is applied to the top panel’s rabbet and then attached to the round substrate using the screw through the glue block. The bottom panel is glued in a similar manner after substituting screws through the bottom of the rabbet for the glue blocks. The whole assembly is clamped tight until the glue dries.
The square middle drawer level used similar construction methods but working with 90 degree intersections was a pleasant change after working with circular objects.
Drawer Boxes for the Curved drawer fronts
I like to make all drawer boxes with router cut 1/2 inch blind dovetails cut and then screw/glue the box to a final drawer front. The router’s template sets up quickly if you keep a setup block with the perfect bit height adjustment. Attaching a drawer side directly to a curved front is an interesting exercise in geometry or you can laminated a milled box front to a block and bandsaw out the front’s matching curve from the block. The drawer box is assembled and then attached to the curve front created during the glue up.
The front of drawer box is the base of a laminated block that allows cutting a match to the drawer front curvature.
A plywood circle used as the template to cut the rabbet in the top and bottom panel is a valuable tool to lay out the drawer box curvature and fine-tune the final surface
After fitting the drawers into the openings to ensure smooth operation, all surfaces are given a final sanding before applying several coats Varathene waterborne polyurethane to all veneer surfaces. Interior surfaces were painted with latex paint.
Three bun 2.5 inches diameter feet were turned from a glued lamination of sycamore. Each foot had a 1/2 inch tall by 1.25 inches diameter stub. The bottom panel of the stationary bottom unit receives corresponding sized holes. The holes were spaced about 120 degrees apart and placed just inside the sycamore strips that formed the panel’s original octagon frame.
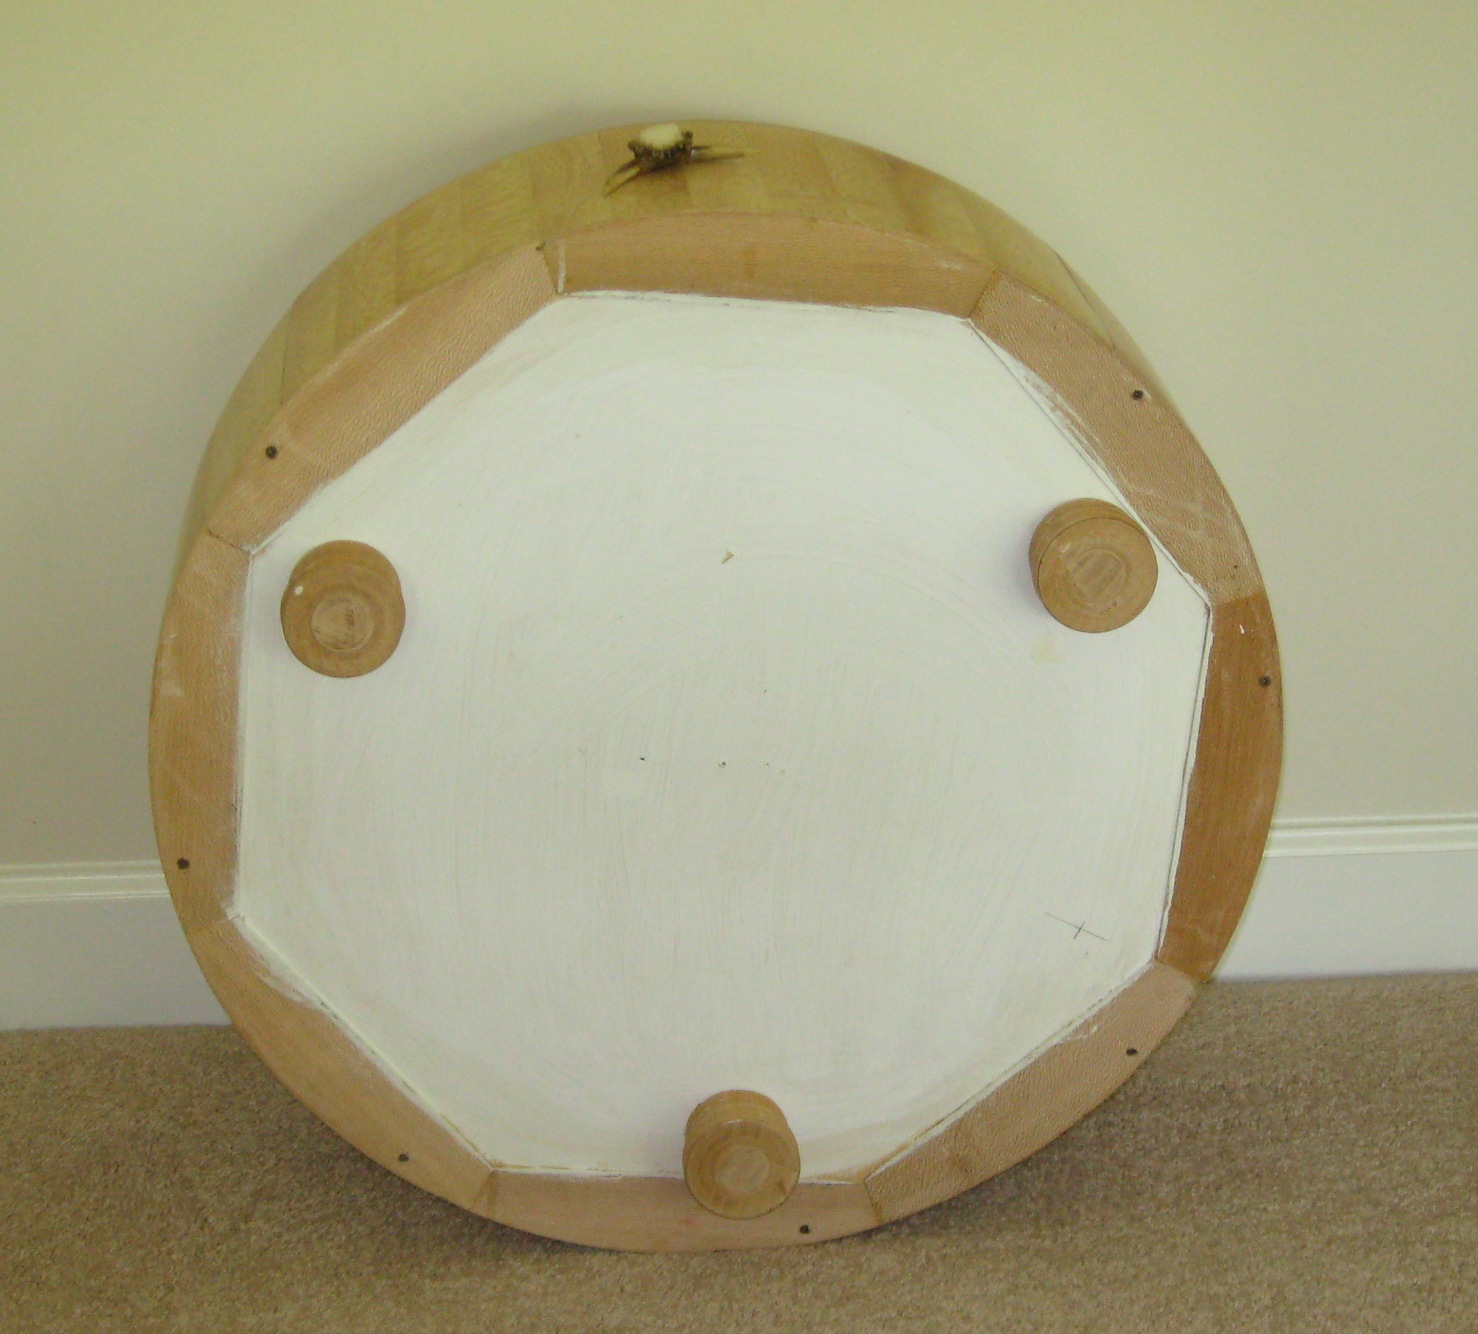
Bun feet are arranged about 120 degrees around the bottom level unit
The pivot point between different levels requires a hole to be drill through the center of the top panel bottom level, top and bottom panels of the middle level and the bottom panel of the top level. A brass bushing is added to each hole. A rotation pin made from a 1/4 inch steel rod and steel stop collar provides a connection point. At this stage, free rotation between the levels occurs but the levels wobble and drag along their outer edges. Polyethylene floor gliders (normally added to furniture legs to protect wooden floors) are the same thickness as the steel stop collar. Adding three gliders to the bottom panel of the middle and top levels eliminated the wobble and provided a low friction contact point.
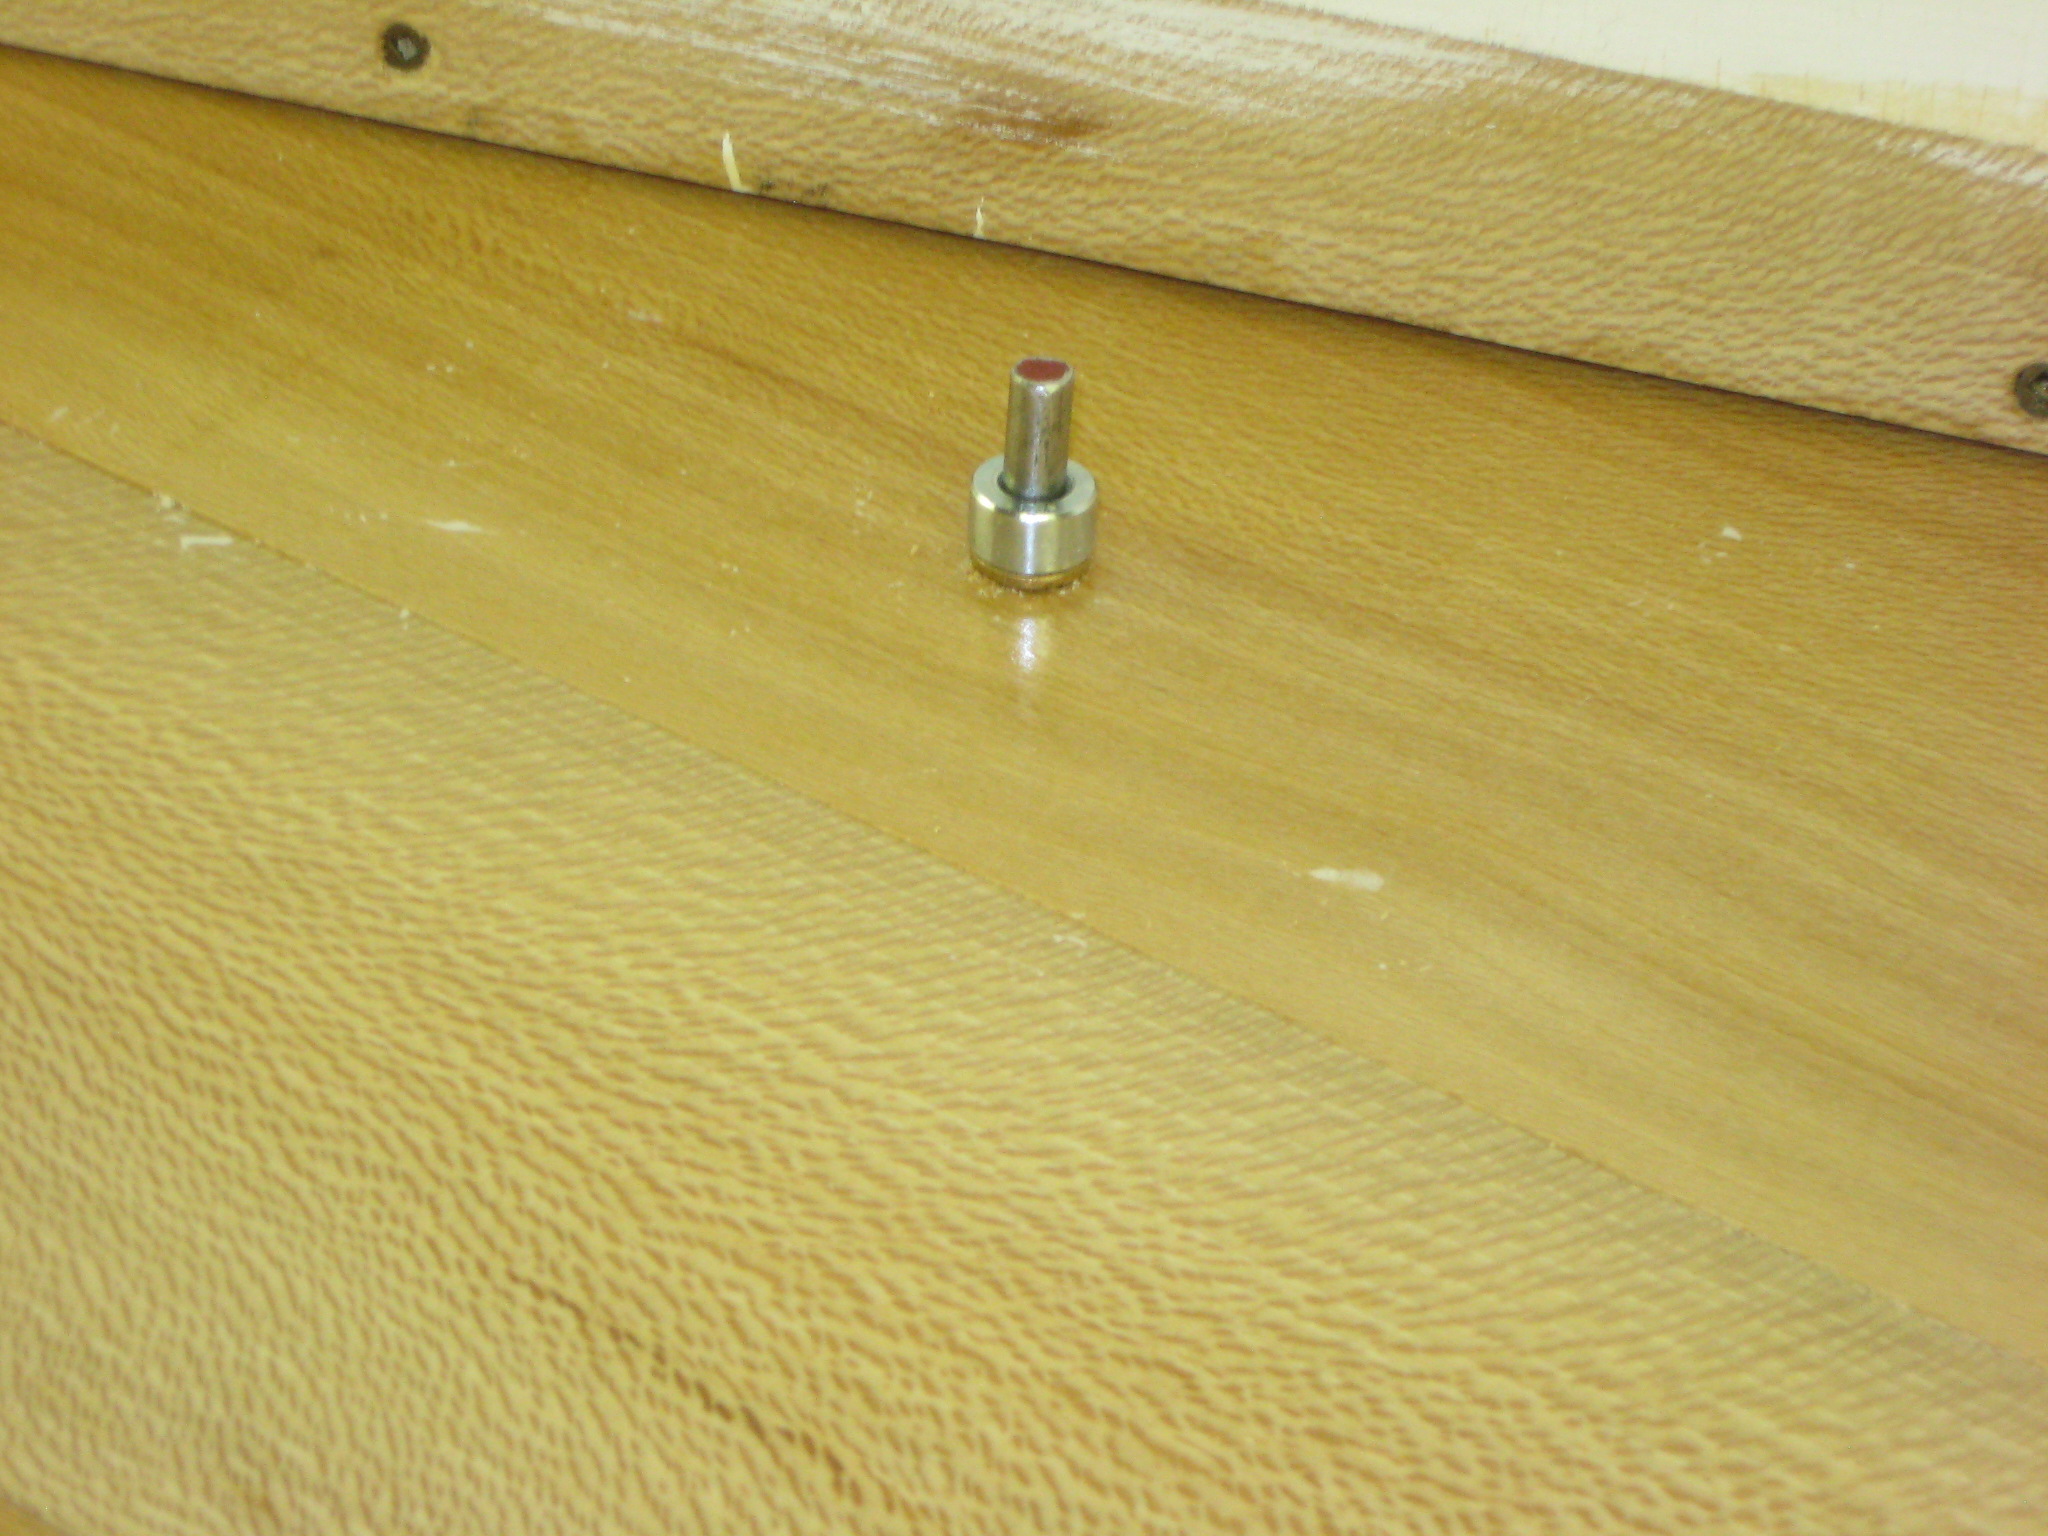
A pivot point created with a steel pin, brass bushings and steel stop collar.
Drawer pulls from Woodworker’s Supply was the final steps before stacking the units in the final resting location.